Adobe MAX Release Updates
Happy Adobe MAX day to all who celebrate! If you check your Adobe Application Manager app you should start to see new versions of your favorite Adobe software starting to appear. Don’t worry if you don’t see it right away as they tend to roll software out to different global regions at different times in a staggered approach, but it will show up soon. Look for a new Lightroom Classic version 14, Lightroom for Mac/Windows version 8, Lightroom for Android/iOS version 10, and Camera Raw version 17 (as well as a new version of Photoshop).
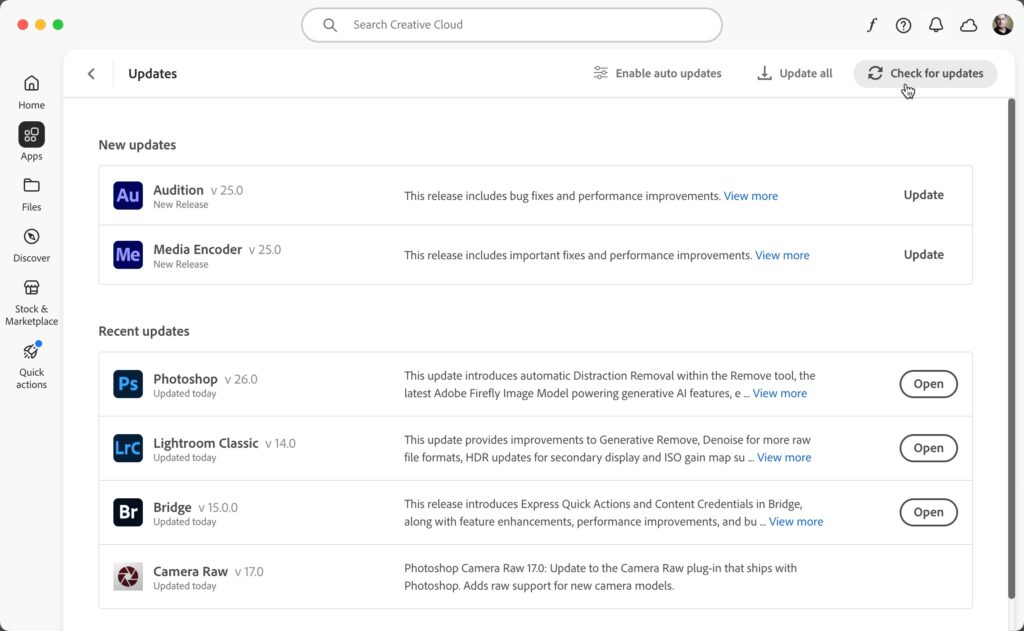
Along with support for new cameras, new lenses, and bug fixes, there are a few important new features to be aware of in both Lightroom Classic and Lightroom. Some of the new features are the same in both, but some are also unique to each application. Let’s start with some new features you’ll find just in Lightroom Classic (LrC).
New Catalog Upgrade (LrC)
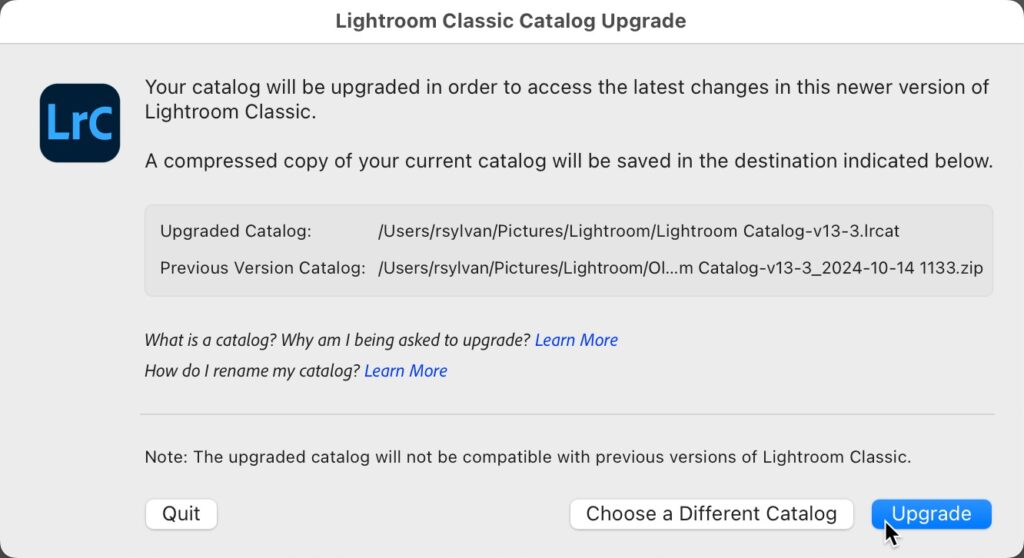
As with each new version number change (from 13 to 14 in this case), you will be required to upgrade a copy of the LrC catalog you want to open in the new version. As soon as you launch the new LrC you’ll be prompted through this process.
Once new aspect this time around you won’t see the option to rename the new catalog here, but don’t worry as there is a new feature for renaming catalogs we’ll look at in a bit. Additionally, note that this process now includes a step where a compressed copy of the old catalog is created at the same time. This is only to preserve your old catalog in case you need to roll back to the previous version of the software for some unforeseen reason. It is worth checking the new minimum requirements for running the new version before you install. Click Upgrade to begin.
When finished, the upgraded copy of the catalog will open in the new version.
Rename Catalog (LrC)
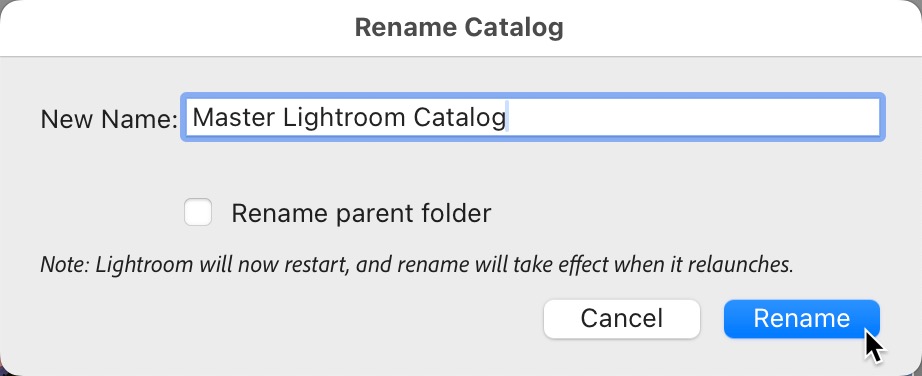
If you now wish to rename your LrC catalog file (which is entirely optional and only for your benefit), head over to the File menu and look for the new Rename Catalog option there. Clicking that will open the Rename Catalog dialog box, which will auto-populate with the current name of the catalog.
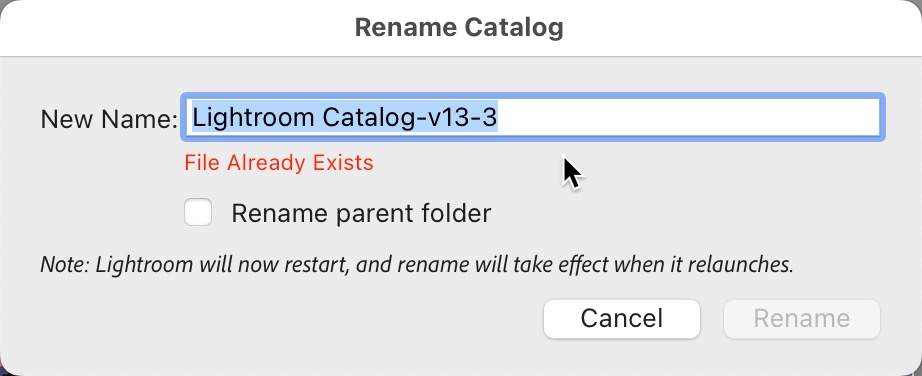
Enter in your new name and click the Rename button, which causes LrC to quit and restart with the new name. Optionally, you can check the box to rename the parent folder too.
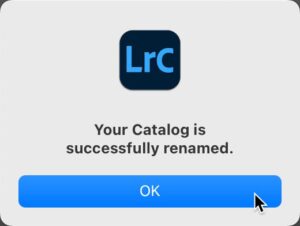
Before relaunching it will confirm the catalog has been renamed, then click OK to have the program launch.
Thankfully, the process is also smart enough to update the preferences to use the renamed catalog if you have changed the Default Catalog setting (Preferences > General) to open the specific catalog instead of Most recent. I don’t know why it took 14 versions to get this, but grateful it is here.
Preview Cache Size Limit (LrC)
On the subject of catalogs and preferences and such, on the General tab of the Catalog Settings dialog, there is a new option in the Preview Storage Management section that allows us to set an upper limit on the size of the preview cache. The goal of the preview cache is to speed up performance by storing ready made versions of imported photos so they load fast in Library while moving through folders and collections (as well as modules other than Develop), so having a large cache is a good thing for performance. However, if left unchecked (as it has been all this time) it can get very large over time. The idea is that you set a storage size limit that you are comfortable with from the perspective of available disk space on the drive where your catalog is stored, and once that limit is reached LrC will automatically purge the oldest preview files to make room for new ones.
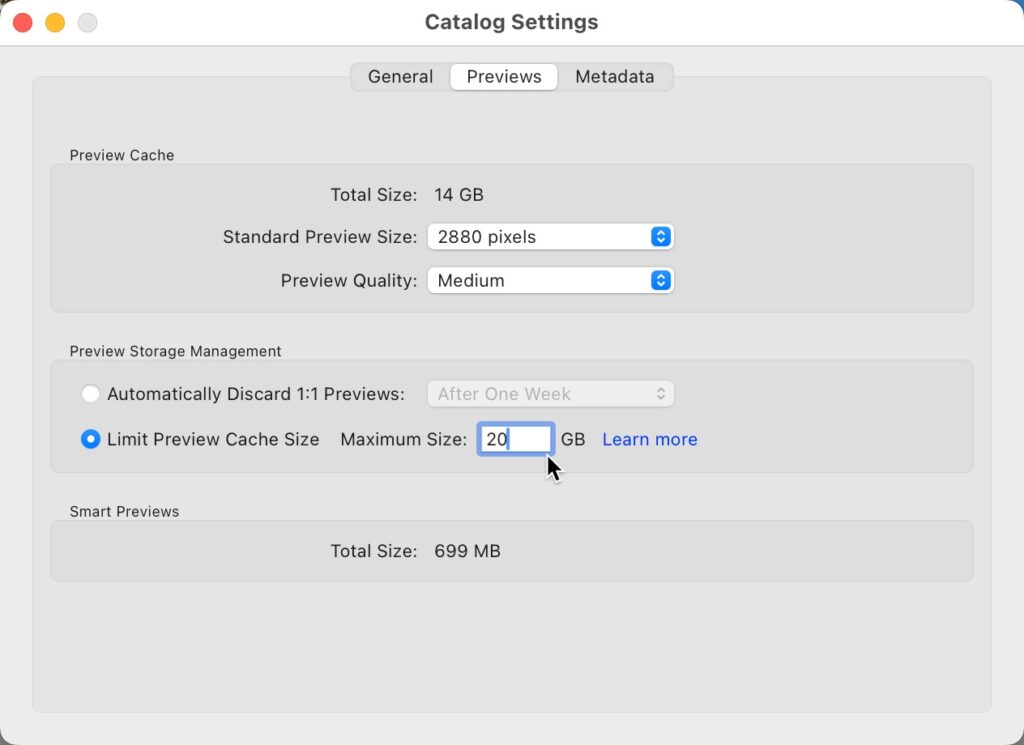
In my case, my preview cache is currently 14GB (as shown above). I try to keep 300GB or so of free space on that drive, so I do have room to grow. I decided to check the box and limit that cache to 20GB and we’ll see how that goes. Note that you will be notified when the cache reaches 90% of that amount, and again when older previews are about to be purged. Keep in mind that LrC will automatically generate missing previews when you view an older folder. The only problem I can foresee is if you have older photos stored offline, as LrC can’t create previews of offline photos until you bring them online again.
One last LrC only thing to note is for Nikon photographers who shoot tethered on Silicon Macs is that you no longer need to run LrC in emulation mode, and support for the Zfc, Z9, and Z6 III has been added. Let’s look at a few things added to both LrC and Lightroom (Lr).
Generative Remove out of Early Access (LrC and Lr)
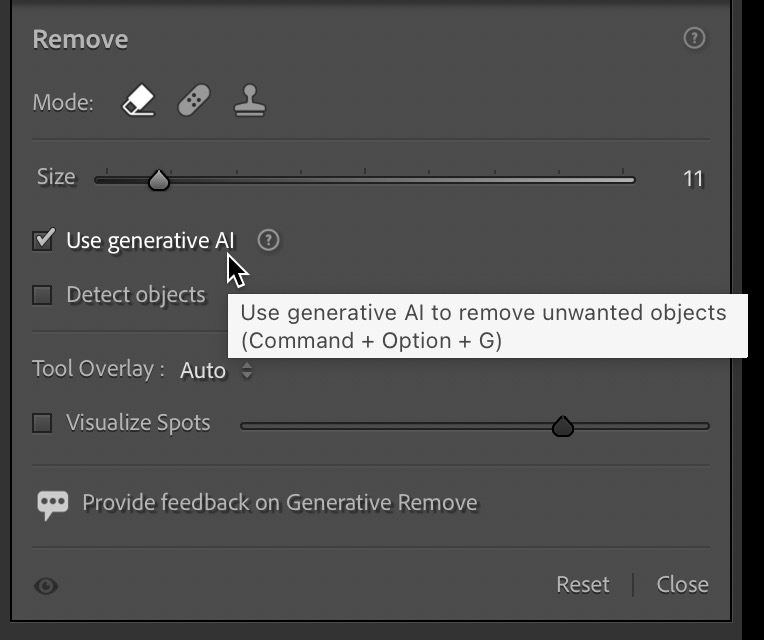
Originally added as an Early Access feature, the Generative Remove feature within the Remove suite of tools is a full-functioning feature. The first time you use it you’ll be asked to agree to Adobe’s User Guidelines for generative AI and then see a few tips to get started.

The panel has been refined, and I’m sure we’ll do a deeper dive on the way it works here soon, but Scott wrote about it when it first added.
Content Credentials (LrC and Lr)
This is being introduced as an Early Access feature, so not fully developed yet. Content credentials is a new type of metadata that allows content creators to add more information about themselves and their work as part of the export/output process. This is a new endeavor through the Content Authenticity Initiative that will likely become more important as the amount of generative AI content grows. You can find the option to include content credentials on the Export dialog in LrC:
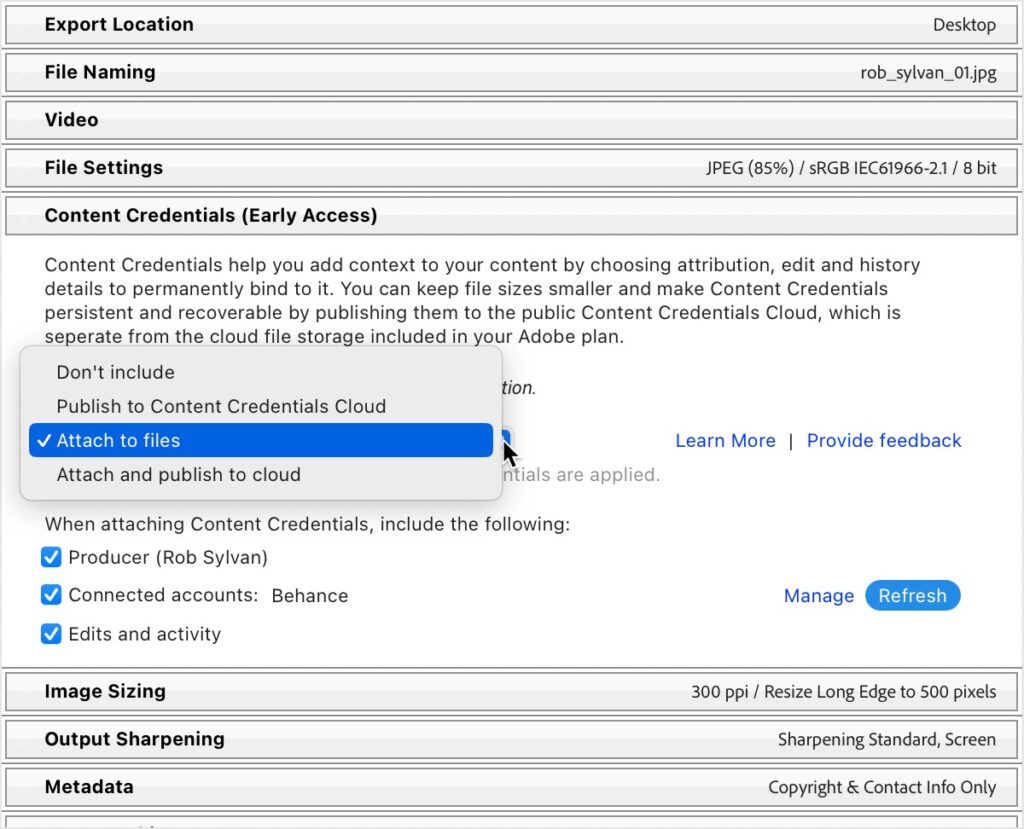
Or as part of the Share dialog in Lr (settings are controlled in Preferences > Export):
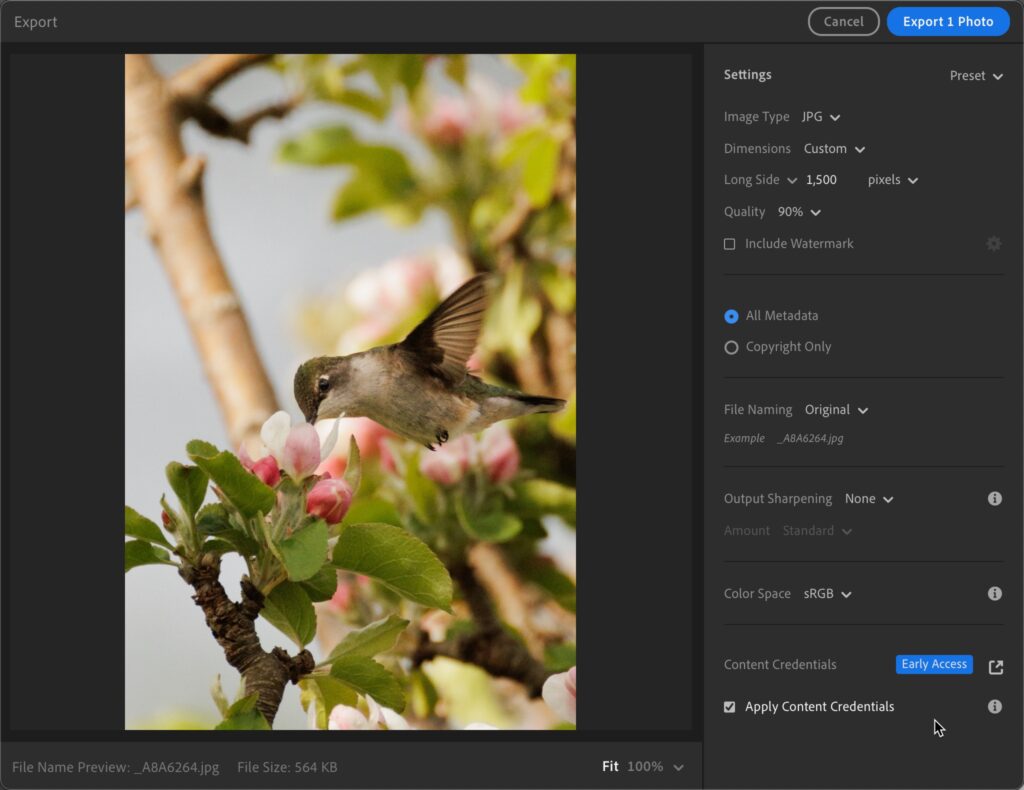
We’ll do a deeper dive into the options, what’s included, and how to get it set up in a future blog post.
Denoise Linear Raw Files (LrC and Lr)
One last thing to note that has been added to both LrC and Lr for Mac/Windows is that the Denoise tool can now be used on linear raw DNGs, which includes merged Pano DNGs, merged HDR DNGs, and other linear raw formats. Let’s wrap up with a look at a few new features added just to Lr.
Smart Albums (Lr Windows/Mac)
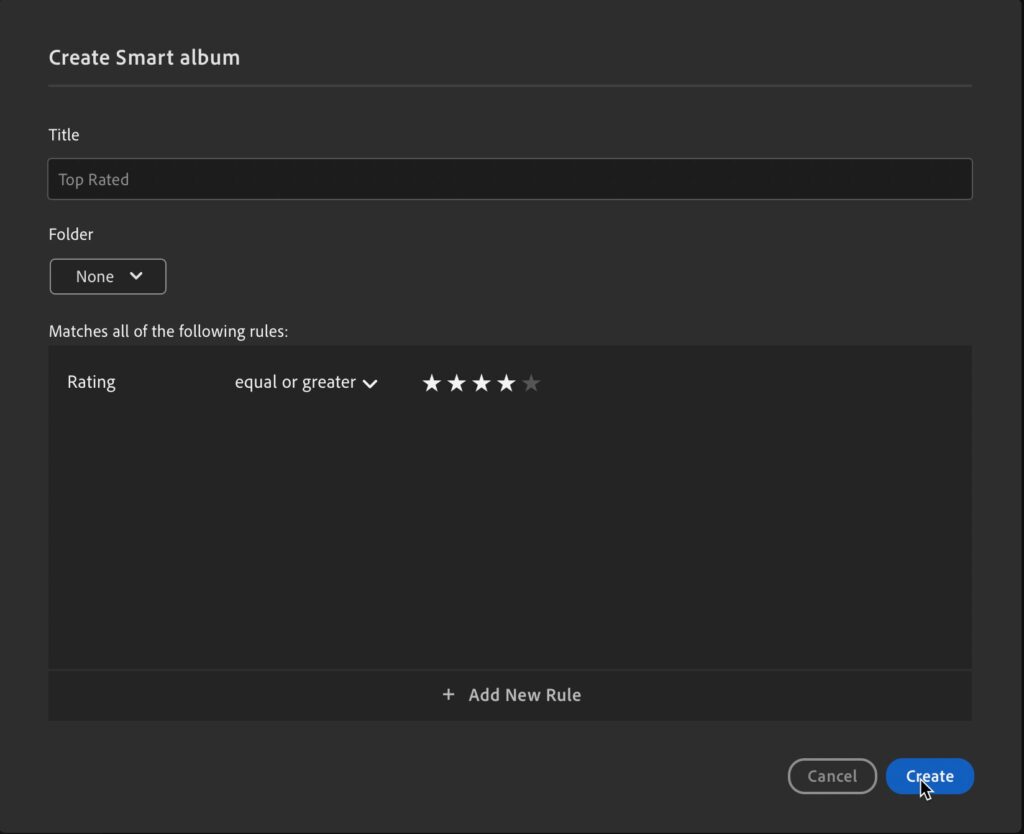
If you’ve used Smart Collections in LrC then you know exactly what Smart Albums are in Lr. However, if you are new to the concept you can think of them both as a sort of saved search where you define the search criteria and then photos (and videos) appear in the saved search (smart album) automatically. Just as Smart Collections don’t sync from LrC to Lr, Smart Albums do not sync from Lr to LrC. You can create a Smart Album by clicking the + sign next to Albums and choosing Smart Album from the list. This opens the Create Smart Album dialog where you configure the search criteria and give the smart album a meaningful name.
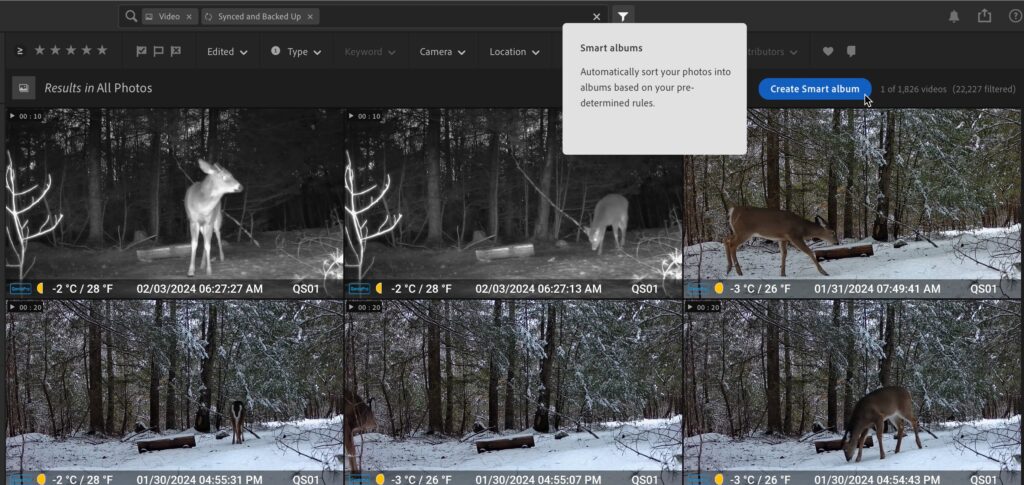
You can also select All Photos, then use the Filter above the thumbnails to filter your entire library on desired criteria, then save that as a Smart Album.
I’m sure we’ll be taking a closer look at how to best use these down the road. This is only in the Windows/Mac (aka Desktop) version of Lr right now.
Edit 3rd Party Apps (Lr Windows/Mac)
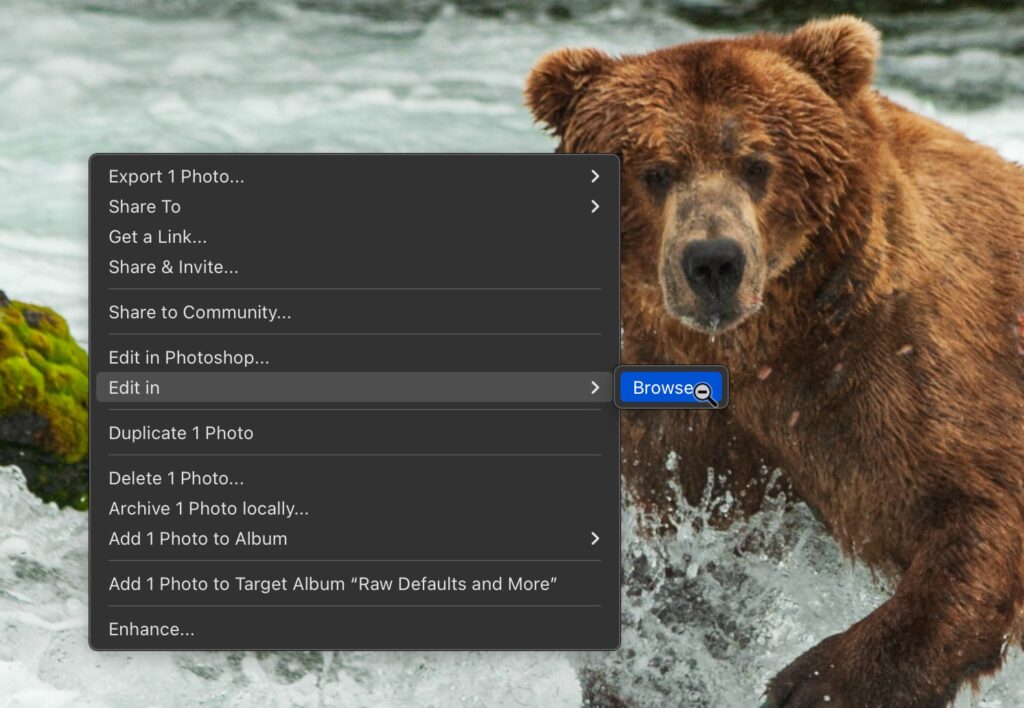
Another new feature only for the Windows/Mac version of Lr is the ability to edit photos in external editors beyond Photoshop. This has been a big limiting factor for a lot of folks who use products like Topaz, On1, Affinity, etc. and want to integrate them with the editing they are doing in Lr. To do this, you can use the File > Edit in, then browse to the application file for the program you want to send the copy to for editing. This can also be accessed by right-clicking the photo and using the Edit in option that appears in the contextual menu.
Quick Actions (Lr Android/iOS and web)
I recently wrote about Quick Actions in Lightroom for web, and this is that same feature evolved and added to Lr for Android/iOS. This is an Early Access feature, so it will continue to evolve over future releases. For now, look for the magic wand icon to have the selected photo analyzed and ready for quick AI-powered edits.
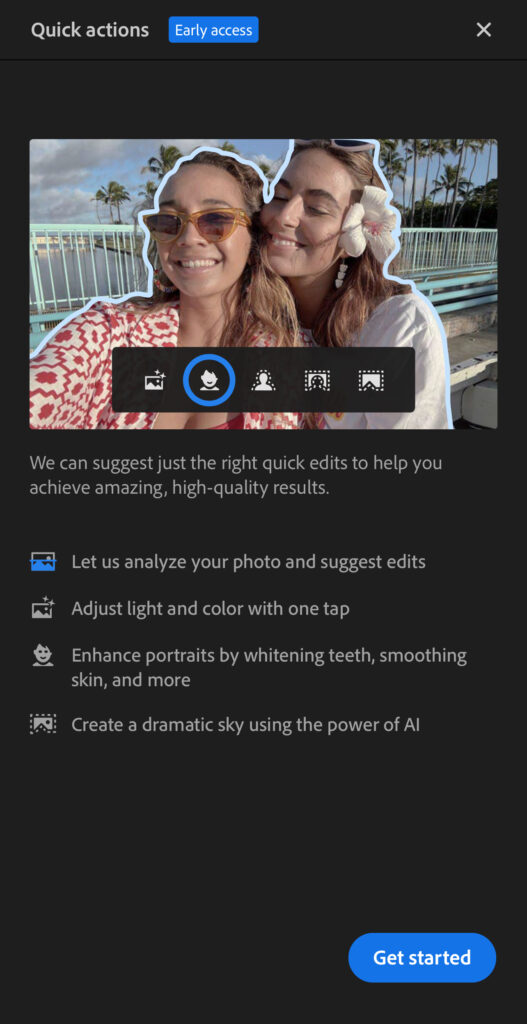
I’m sure we’ll see this feature added to Lr for Windows/Mac in the future as well.
So that’s the highlights for LrC and Lr, but be sure to check out Adobe’s own rundowns for what’s new in Lightroom Classic and Lightroom, and check back here for deeper dives into all the new features in coming days.


Pity LrC 14 is so buggy again… Library module works like s#1t…. Adobe.. do something!