Day 15 of “Lightroom Only” Month (Interior/Architecture HDR Look)
Hey everyone. Sorry for the late post. I’m on my way up north to teach my Lightroom 5 Seminar tomorrow. Anyway, welcome to Day 15 in my self-project-ish, month-long postings of images I’m only using Lightroom to edit. If you’re just coming in to reading this and haven’t read the original post where I wrote why I’m doing this, then make sure you check that out too. Okay, here goes:
The Photo: St. Patricks Cathedral
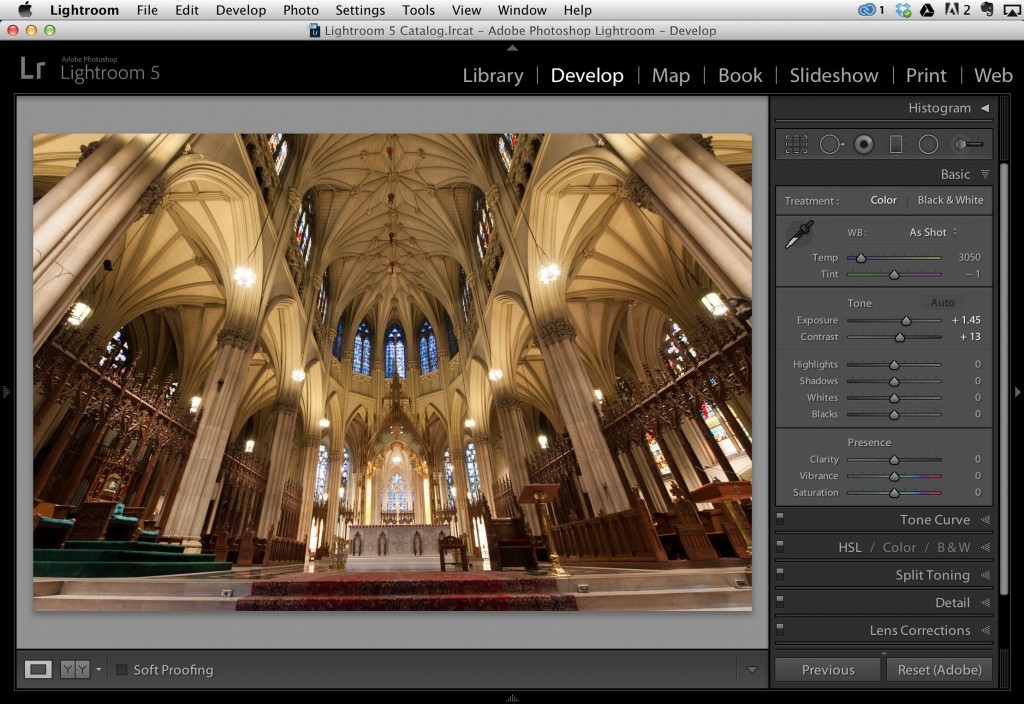
A few years ago I was in St. Patricks Cathedral and took the photo below. I wrote about it at the time because it has an interesting back story – here’s the link if you want to read. I’ll warn you now though, some of the comments get pretty crazy. Anyway, the photo is actually part of an HDR series I did, but I decided to see what I could do here with just one exposure.
(click to see the image larger)
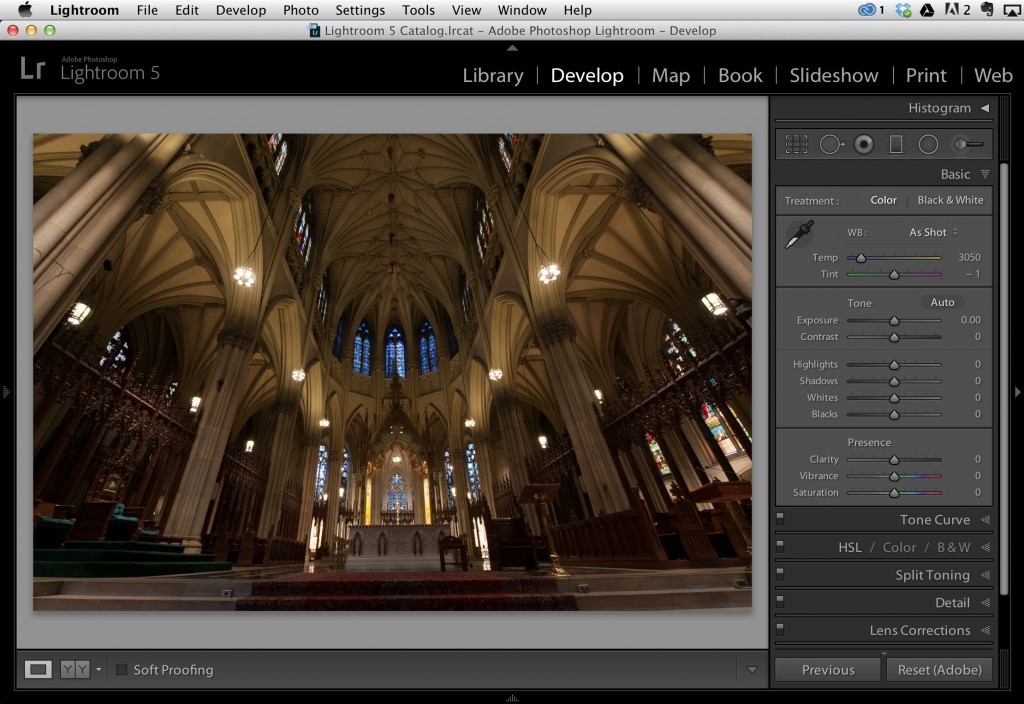
Photo Details:
Camera: Nikon D700
Lens: Nikon 14-24mm
Aperture: f/16
Shutter Speed: 2 sec
ISO: 400
Basic Processing
The Auto button did a good job here as a start. It really make the overall exposure look good. I did cool the photo just a bit by moving the Temp slider to the left a tiny bit.
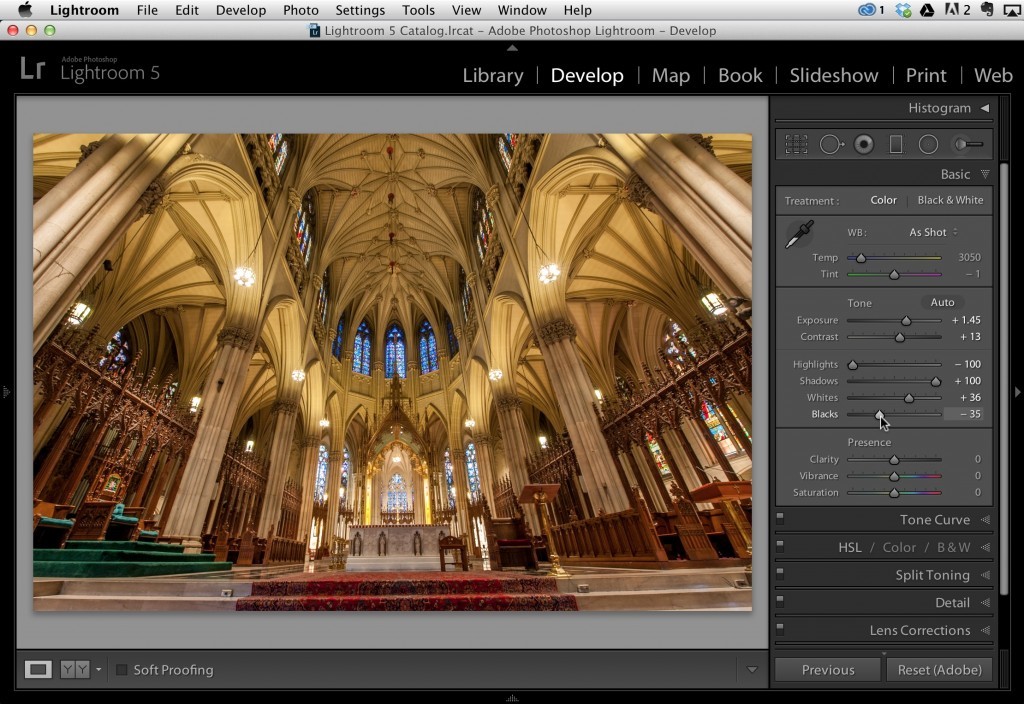
The Auto button didn’t touch the Highlights and Shadows though, and that’s what’ll really give this photo the HDR look. So I pulled back on Highlights as far as it’ll go and opened the Shadows as far as they’ll go. I also set the Whites/Blacks by holding down the Option/Alt key.
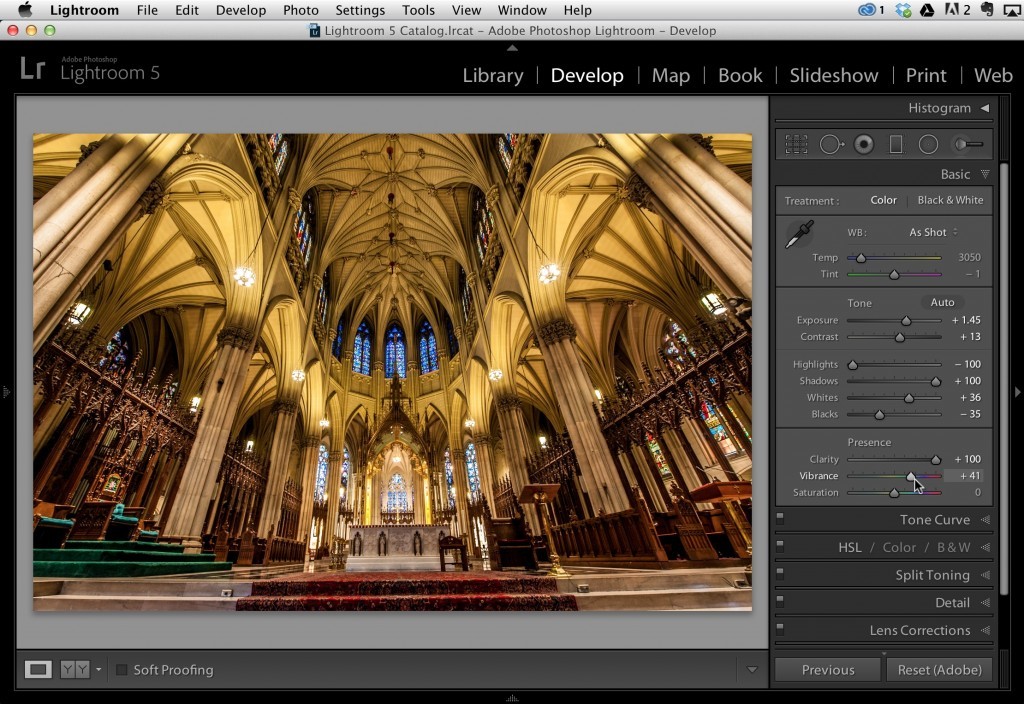
Finally, I added 100% Clarity to give the details more texture and help achieve the HDR feel. I also added a good amount of Vibrance to give the appearance that the golden areas on the ceiling were glowing. Yeah, I know it looks pretty punchy in color but I like it.
Crop and Straighten
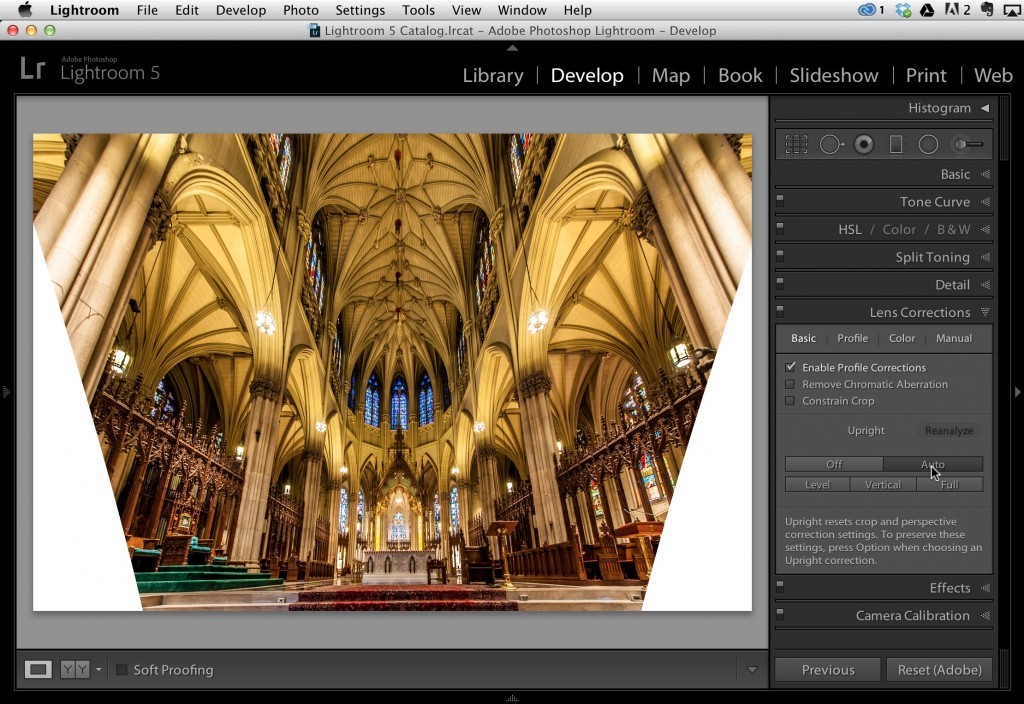
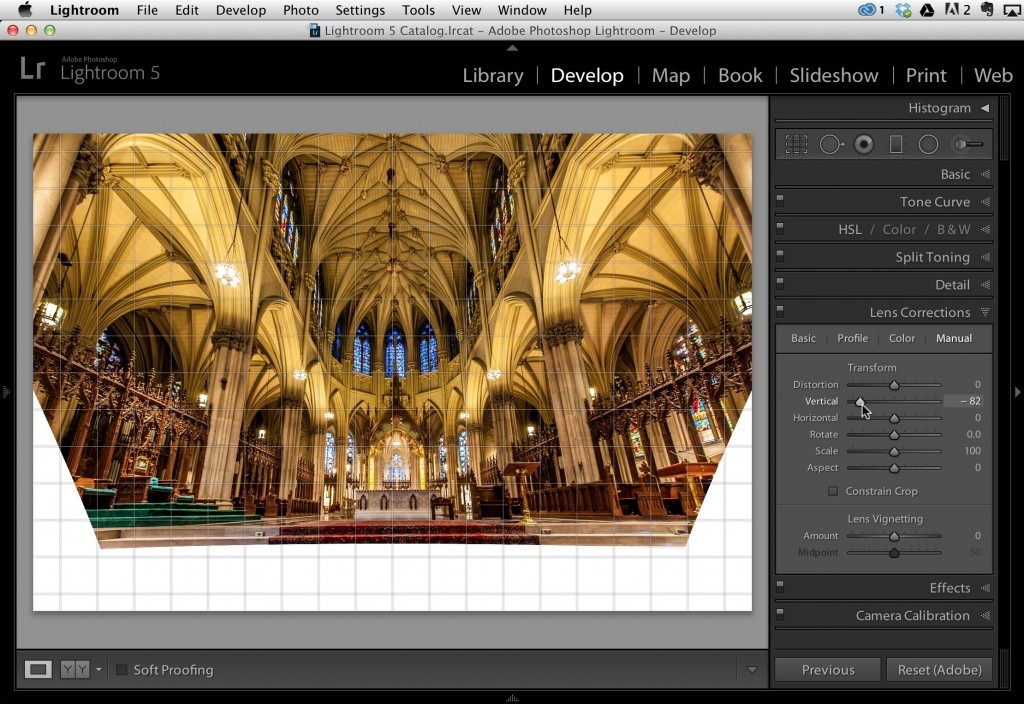
Okay, this is a wide angle photo with lots of vertical lines in it. If I were an architectural photographer, then I’d probably need to fix this. One way to help would be the Lens Correction panel. First I clicked the Enable Profile Corrections checkbox. Then I tried the Auto Upright button and this is what I got.
So I un-did that change and tried the Vertical slider under the Manual tab. Not so good either 🙂
Then it hit me. I’m not an architectural photographer. And most other people aren’t either. So the rest of the world, including me, doesn’t care about straight lines. So I’m not even going to bother trying to fix it. However, I did go to the Straighten tool and dragged along the top of the step (along the bottom of the photo) to straighten the tilted aspect of the photo.
The Detail Panel (Sharpening)
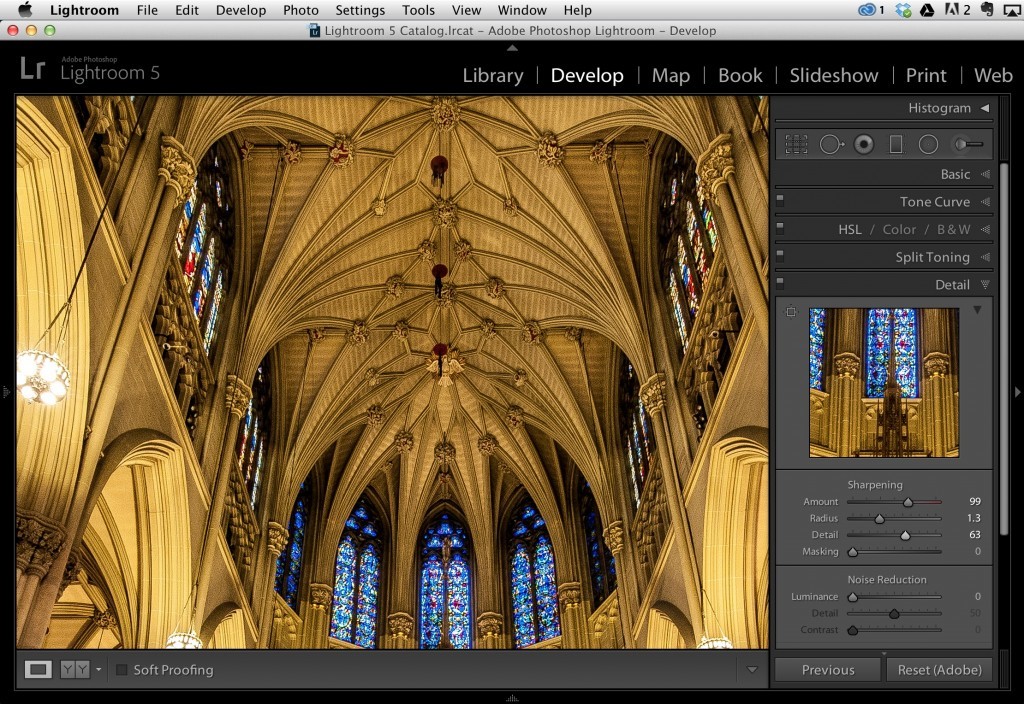
If there’s any photo that can handle a TON of sharpening it’s this one. I cranked up the Amount setting. Changed the Radius to 1.3 (pretty much right around where I leave it for every photo) and added some Detail as well. No need for masking since, like I said, we’ve got mega-details in this photo and there’s no reason to hide the sharpening from any areas.
Retouching
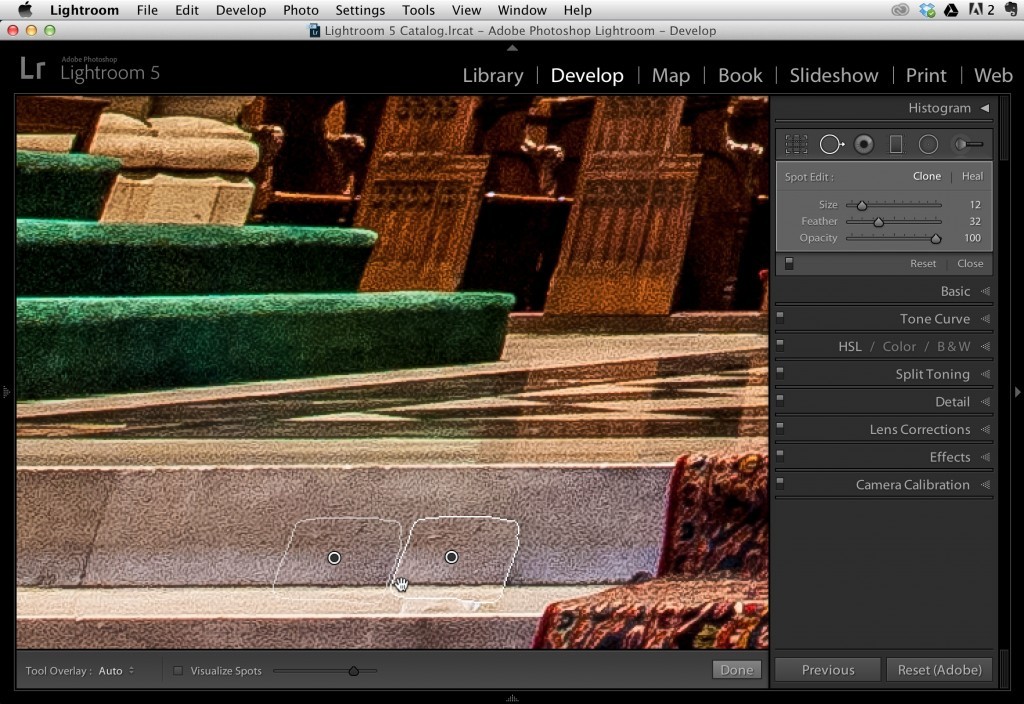
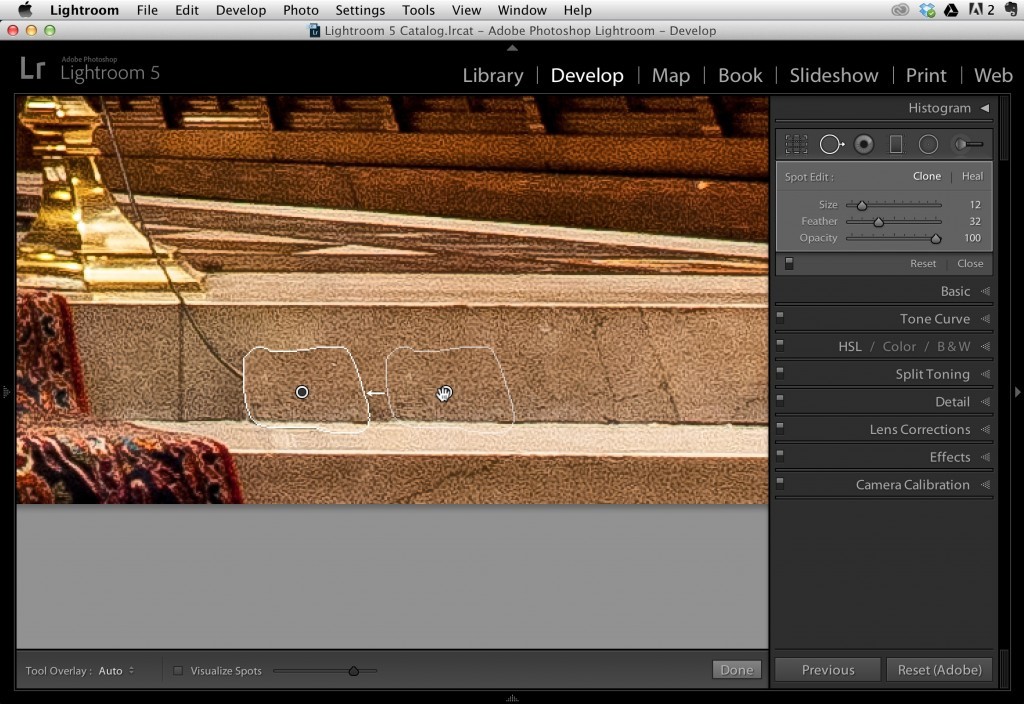
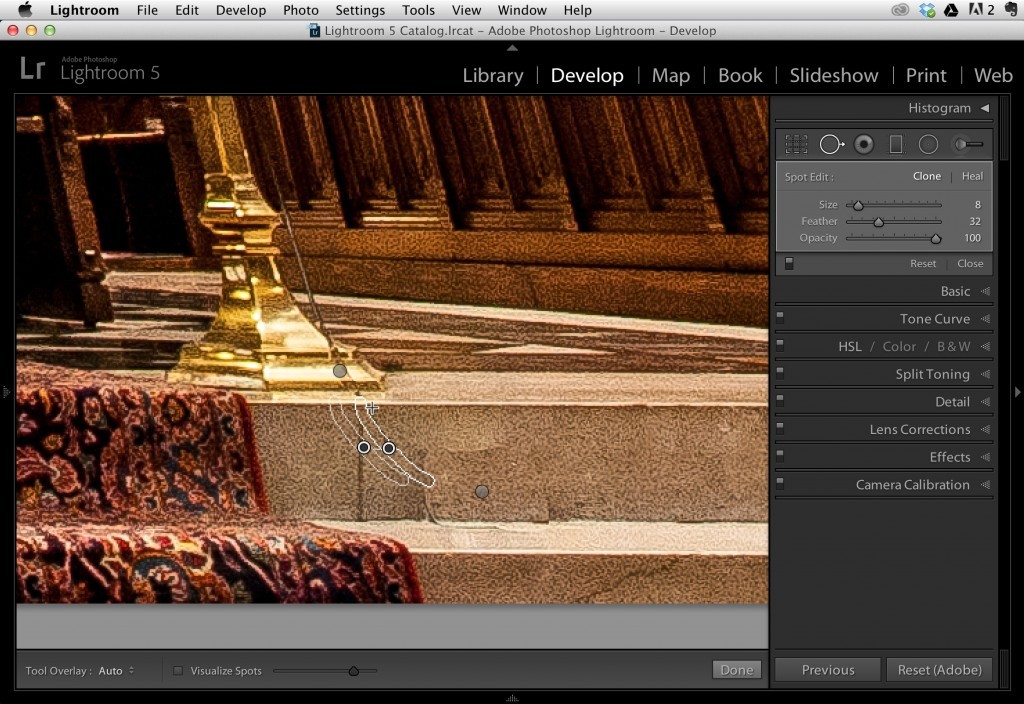
There looks to be some little electrial boxes on the floor to the left and right of the red rug. Originally, when I first processed this photo, I used the Clone Stamp tool in Photoshop. This time around I used the Spot Removal tool. I set it to Clone mode (because I want to precisely fix it with the exact area next to it) and painted over the box. I also used a very low Feather setting so that the edges don’t get blurred. I think it worked pretty well overall.
I also used a small brush on the chord between the box and podium. Lightroom did okay, there, but it’s definitely not perfect. It’s one of those things that I notice, but I don’t think some one who never saw this photo before would see it.
The Adjustment Brush
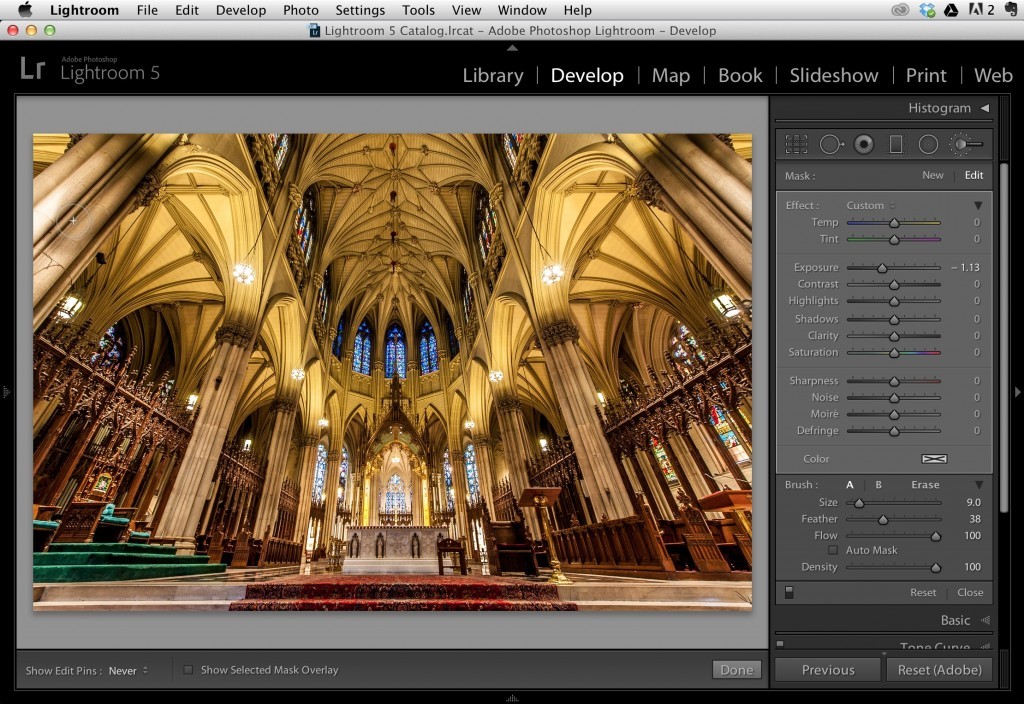
Those pillars near the edges of the photo on the top left/right looked pretty bright to me. So I grabbed the Adjustment Brush, with negative Exposure, and painted over them to lessen their impact.
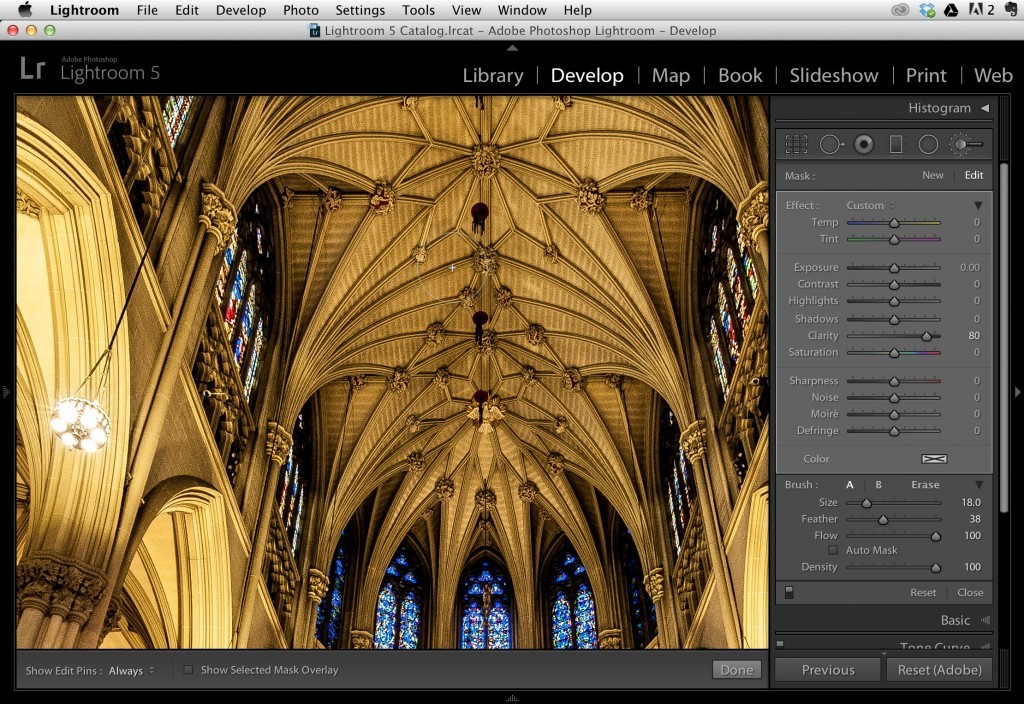
As you’ve probably seen during the month a few times, we can add Clarity on top of Clarity by brushing Clarity on the photo (even though we’ve already added it above in the Basic panel). Since I’m really going for an HDR style photo, we can push this pretty far, but I only added one extra layer (you could always right-click on the adjustment brush pin and choose Duplicate if you wanted more).
Finishing Touches
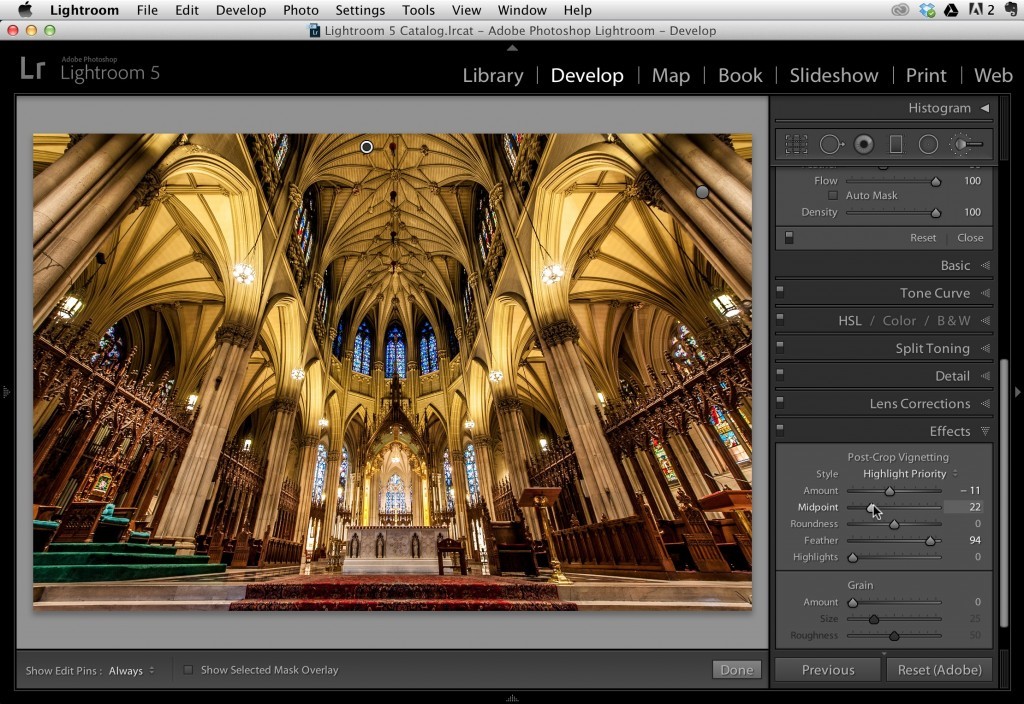
Nuttin’ too crazy here. I just used the Vignette setting in the Effects panel. And I didn’t go too dark because I think our Adjustment Brush work above already did a good job at darkening the really bright parts I was worried about.
What Else?
For the most part, Lightroom did everything great here. However, HDR photos have a certain look and feel you get from the HDR processing software. We got close here in Lightroom, but you just can’t get the same results you’d get from processing 3 exposures in HDR software. But it is pretty darn close and I’m not sure I like the HDR version any better.
Here’s a quick Before/After:
[tabs slidertype=”images” auto=”yes” autospeed=”4000″]
[imagetab width=”836″ height=”558″] http://lightroomktips.wpengine.com/wp-content/uploads/2014/01/Day15_before.jpg [/imagetab]
[imagetab width=”836″ height=”558″] http://lightroomktips.wpengine.com/wp-content/uploads/2014/01/Day15_after.jpg [/imagetab]
[/tabs]
Have a great day and I’ll see you back here tomorrow for the final day in “Lightroom Only” month! 🙂

