Lightroom Classic 7.4 Update
The June update to Lightroom Classic (7.4) is out, and here are the things you should know:
Disable Preset Rollover
The April update to Lightroom Classic (7.3) included a new feature for displaying a live preview of your Develop presets that some people loved, and others, well, not so much. The problem for some people was that the rollover preview in Loupe view was a little too resource intensive, or it was distracting to how they were used to using presets. A new preference checkbox was added to the Performance tab of the preferences labeled, Enable hover preview of presets in Loupe. If you want to turn off that rollover behavior, just uncheck that box.
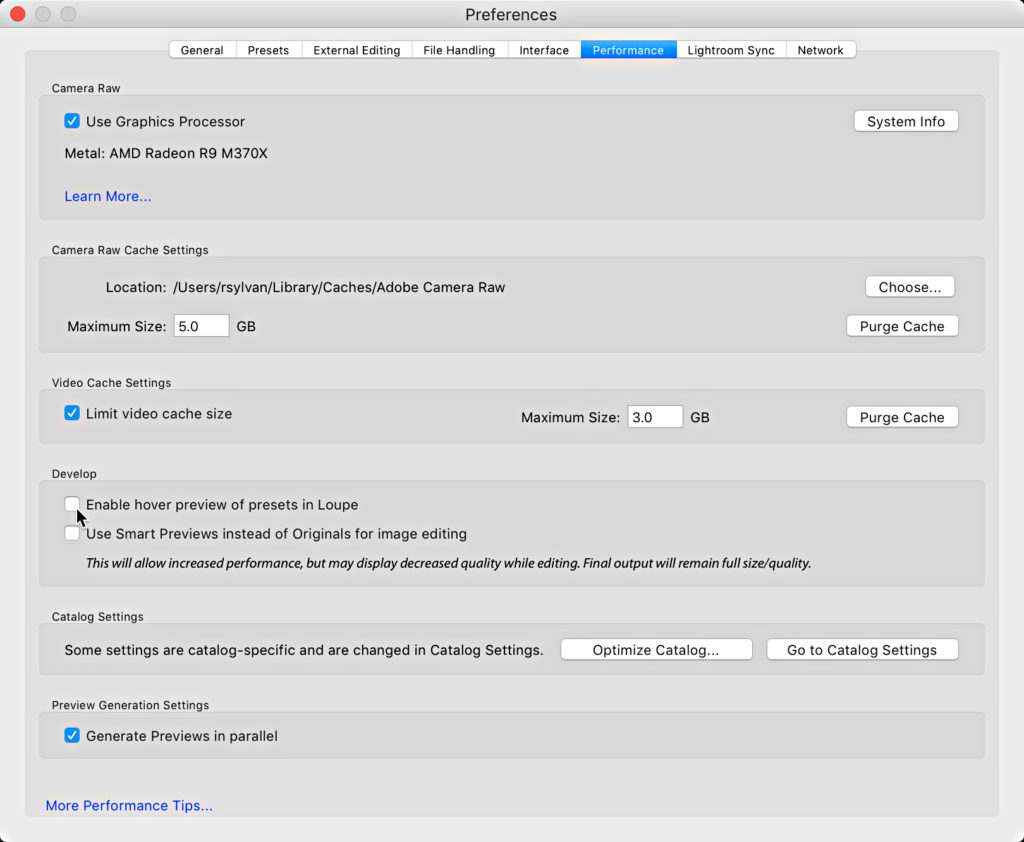
Note, that doesn’t affect the rollover nature of the new Profiles. That can’t be turned off for good, but if you hold down the Option key (PC: Alt) while moving your cursor over the Profile Browser it will temporarily disable the Profile rollover preview. Big thanks to Adobe engineer Simon Chen for sharing that tip!
Hide and Show Develop Preset Folders
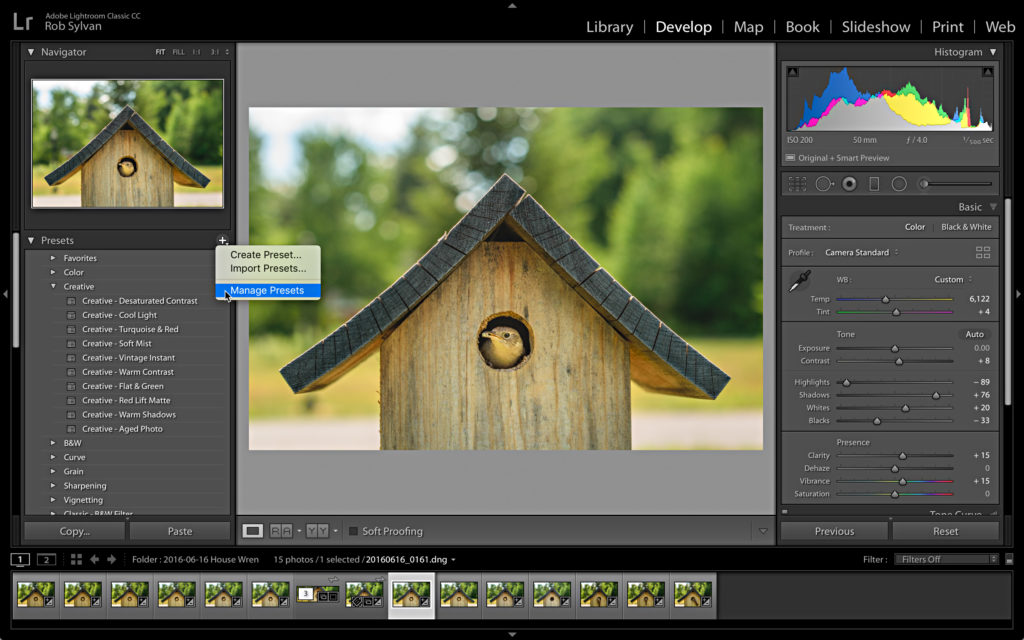
Another aspect of the April update was a chance to Develop presets that introduced some new preset folders, but left us without the ability to remove ones we don’t use. 7.4 includes a new Manage Presets command that lets us hide any default preset groups we no longer want to see. Try this:
Step One: Click the + sign at the top of the Presets panel and choose Mange Presets.
Step Two: In the Manage Presets dialog box, uncheck any preset folders you want to hide and click Save.
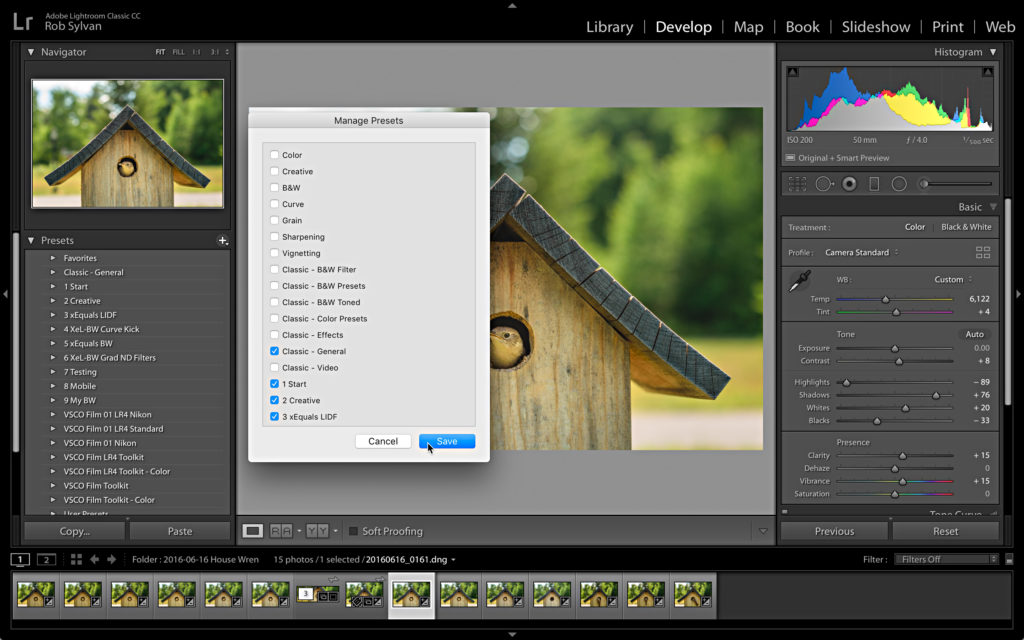
You can bring those preset folders back by returning to the Preset Manger and checking the respective boxes and clicking Save again.
Hide and Show Profiles
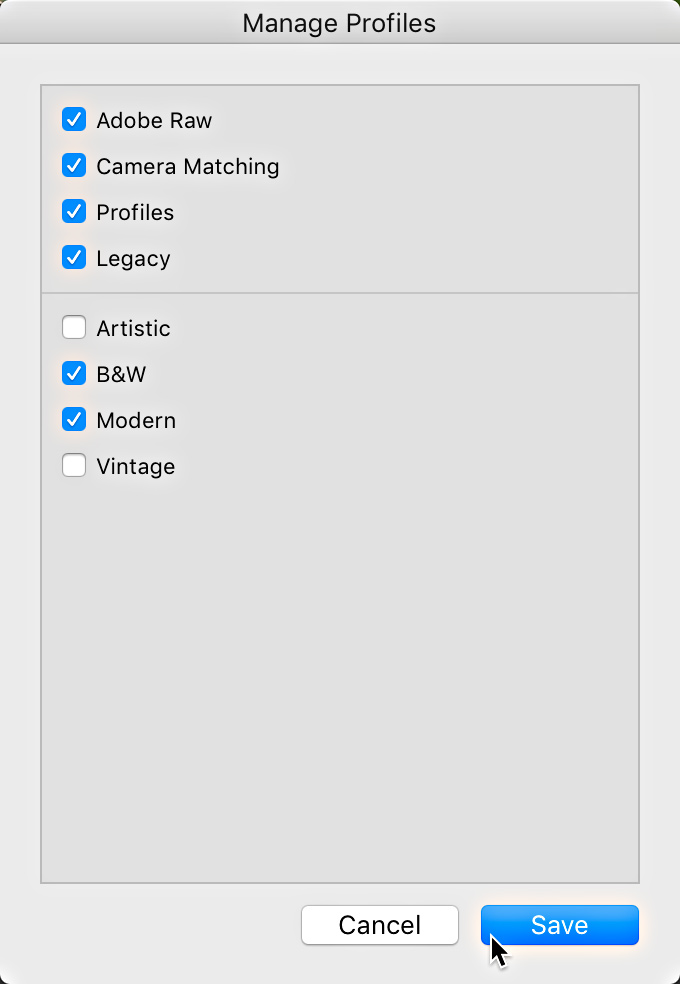
The Profile Browser gained a similar tool for showing and hiding profiles based on your workflow. The way to access the Manage Profile dialog box is by right-clicking any Profile group, then choosing Manage Profiles from the contextual menu. Note, there are also options there for expanding or collapsing all profile groups, as well as a way to reset hidden profile groups.
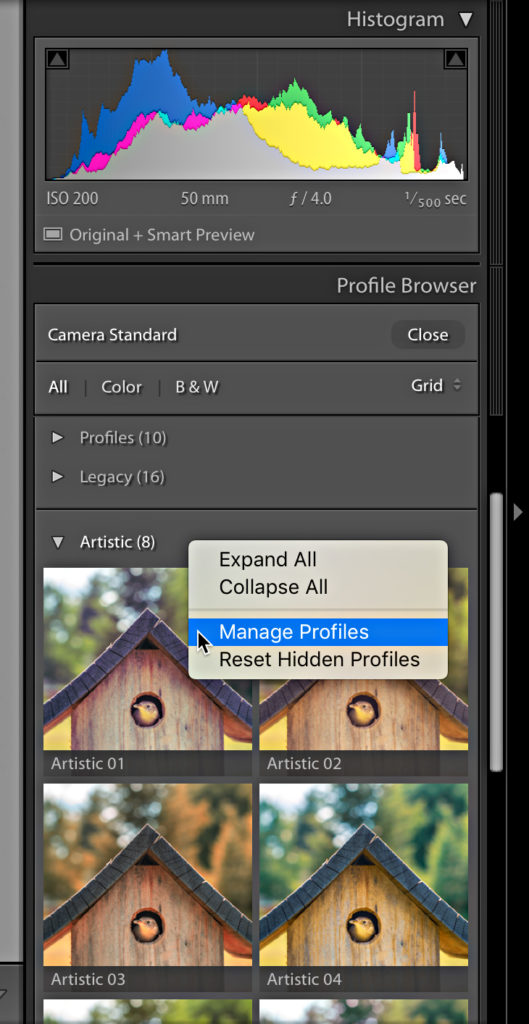
Once chosen, the Manage Profile dialog box appears, and you can uncheck the box next to any group you no longer want to see, then click Save.
Auto Stack HDR and Pano
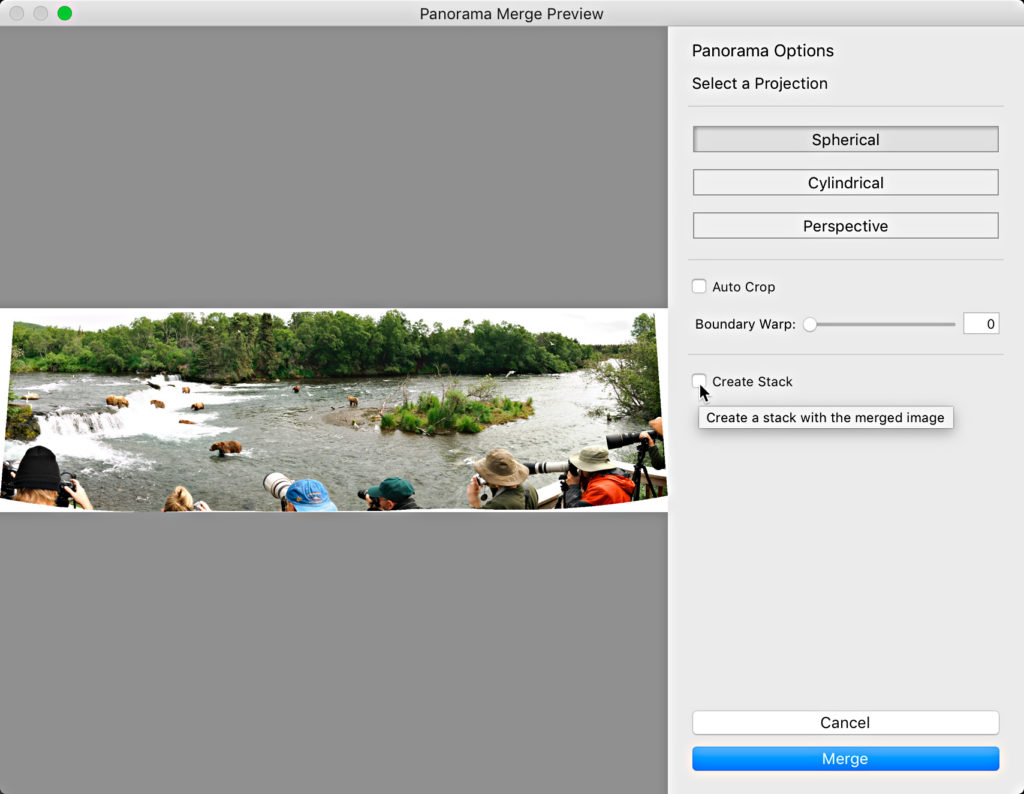
Both the Photo Merge > Panorama and Photo Merge > HDR dialog boxes got a new checkbox labeled, Create Stack. When checked, Lightroom will create a stack out of all the selected photos for the merge operation and stack them together, including the merged result. A nice way to keep things tidy, and a welcome addition.
Color Labels for Folders
You can now assign color labels to your folders. I’m all for new tools to help people manage their folder structure and find what they are looking for, and I can see how developing a color coded system could be a real asset. To assign a color to a folder, simply right-click the folder, then within the contextual menu go to Add Color Label, and choose your color from the list.
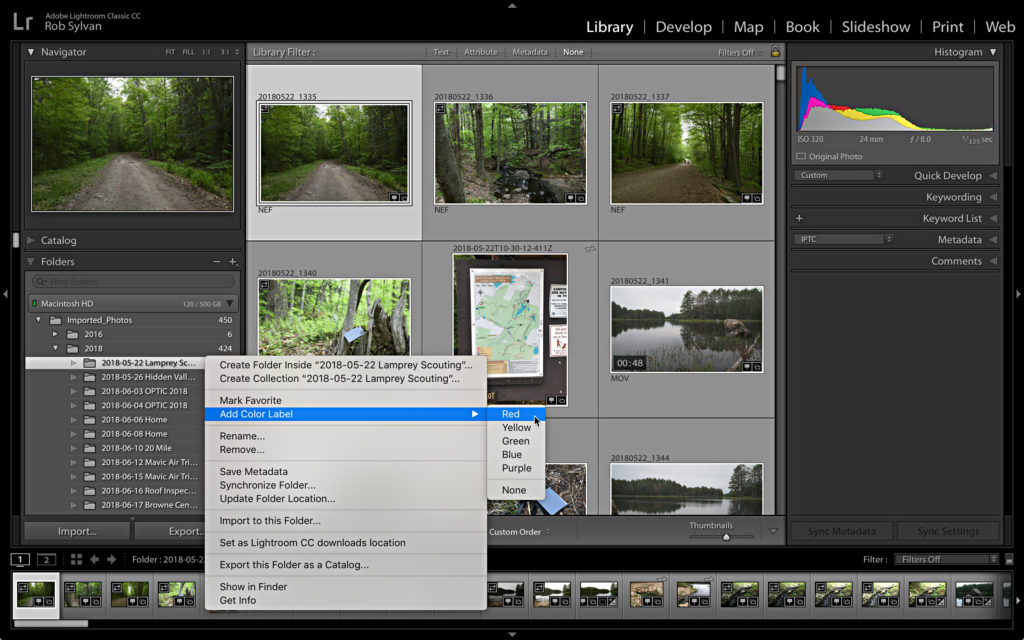
You can remove a color label the same way. Note, you can even select multiple folders and assign all selected a color at the same time.
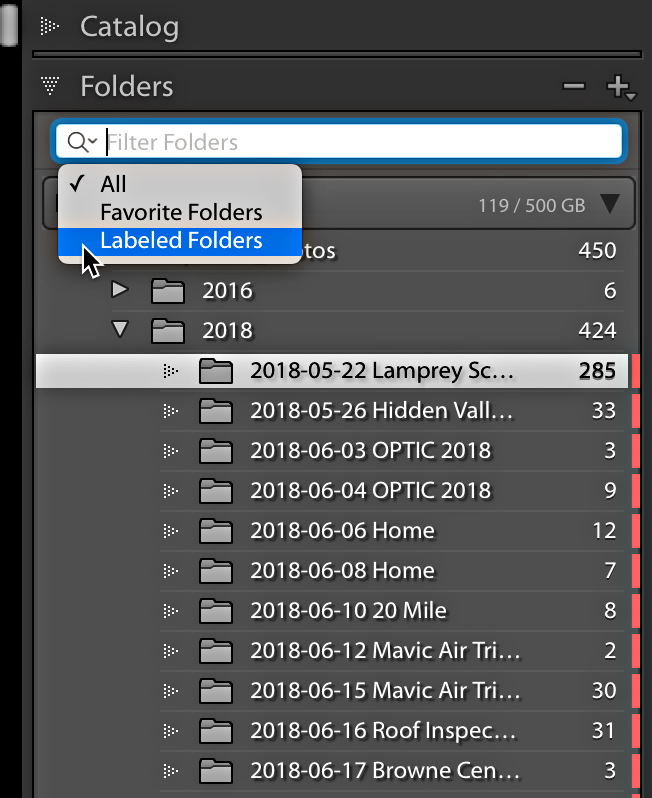
Once you’ve assigned color labels to folders you can use the Filter field at the top of the Folders panel to display only folders with a color label. This effectively hides the non-labeled folders, which could also be useful to some. The Folders panel filter has also had some additional work done to make it work faster when searching for folders. Give it a spin (and don’t forget to go back to the Filter and choose All to bring back your other folders).
I’d like to see this little feature extend to collections too.
Additional Notes
There was also support for new cameras and lenses added, as well as other bug fixes you can read about on Adobe’s own feature summary.
Be sure to check out Terry White’s great video on June updates to Lightroom CC.


